
Glowy Chat Widget
Thanks for downloading our widget!
Here you will find instructions on how to set everything up and an in-depth description of its possibilities.
⚠️ Take note: This widget is hosted on StreamElements and works only with StreamElements donations — make sure you have a StreamElements account before setting it up!
Widget Installation
- Log in to StreamElements with your Youtube or Twitch account
- Go to the “2. Widget” folder in the package you’ve downloaded
-
Pick the file that corresponds to your streaming platform (Twitch or YouTube) and double-click to install it.
Voila! Your widget is installed!
Widget Customization
-
Pick your widget in your StreamElements dashboard and click “Edit”
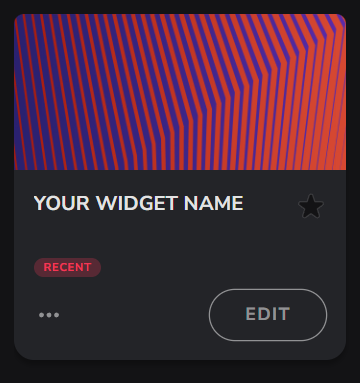
-
Click on “Layers” and go to your widget.

- Go to the “Settings” tab


- Woohoo, here you can customize everything to your taste :)
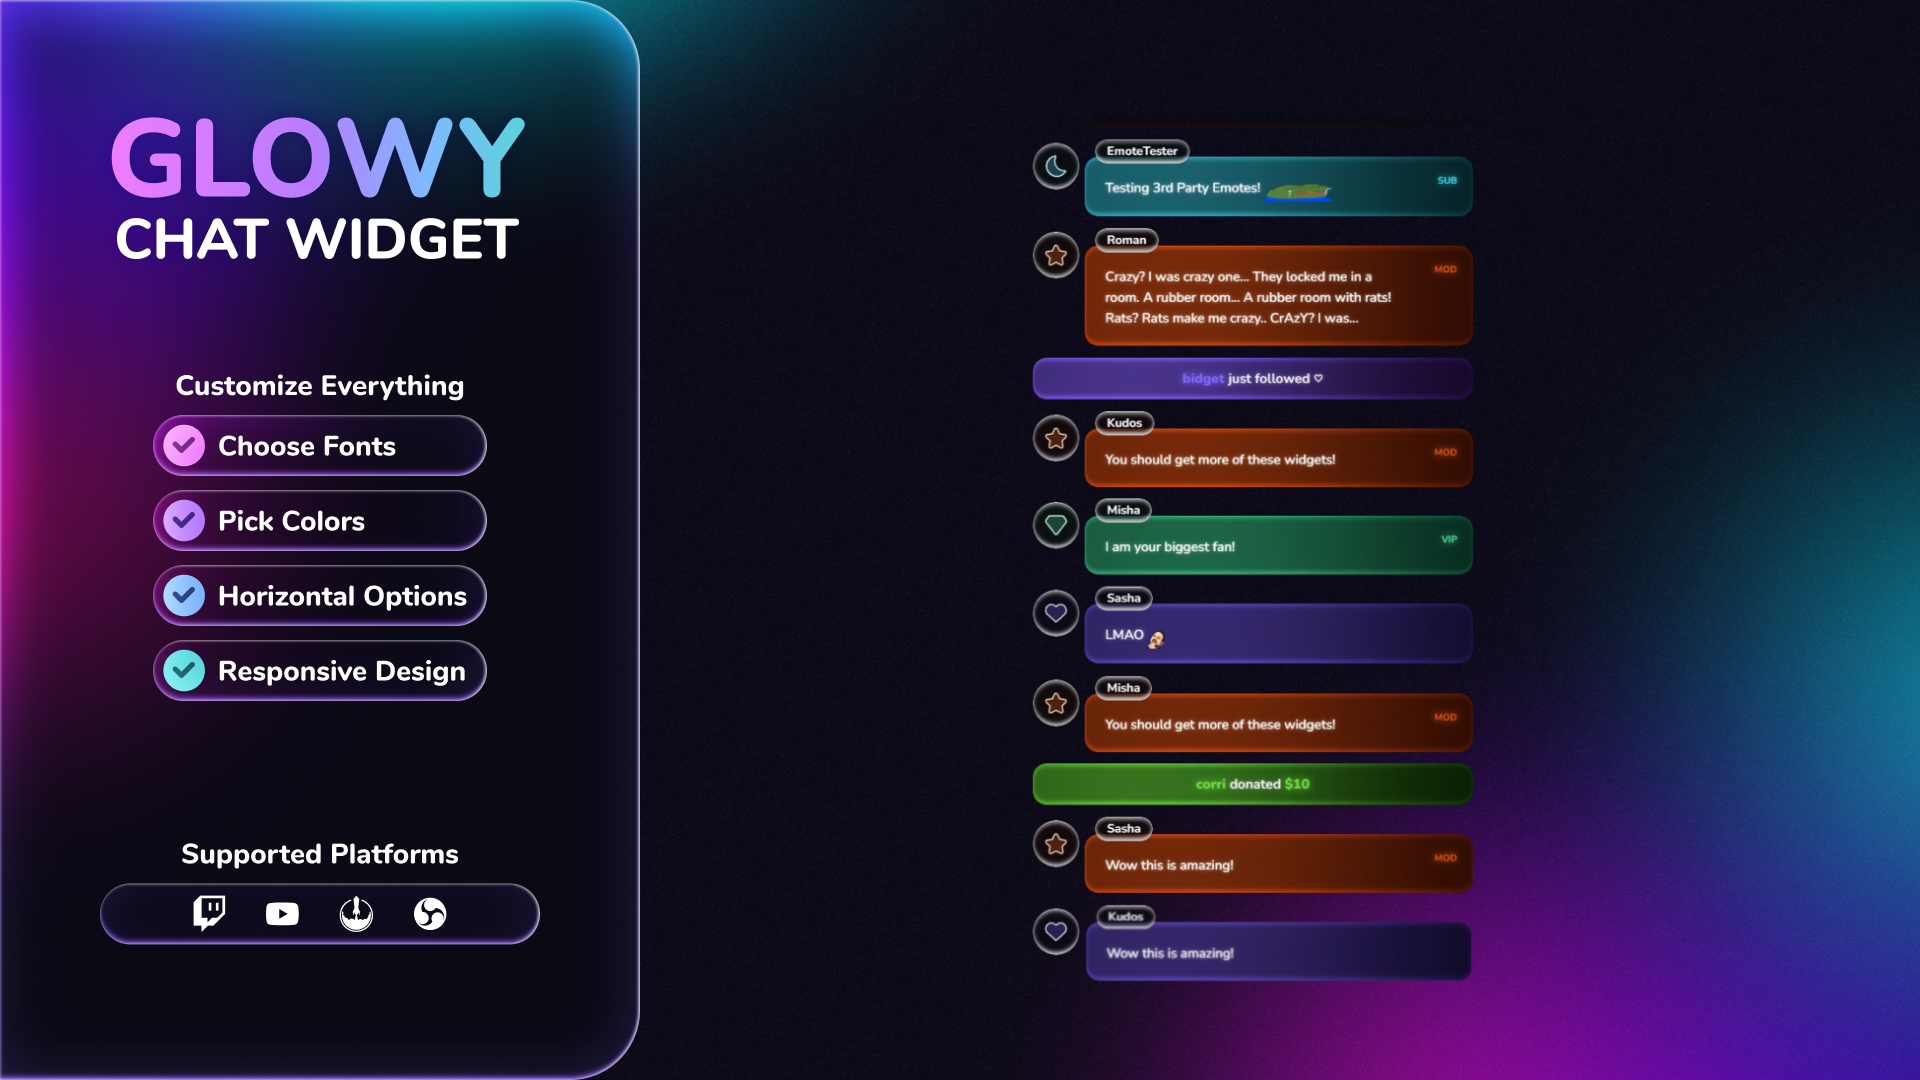
Customization Options
⚠️ IMPORTANT
For all of your customizations to take effect, you need to press "Save" in the top right corner of the editor and refresh the page before adding the widget to your streaming software!

⚙️ Behaviour Settings
| Name | Description |
|---|---|
| Horizontal Layout (Right → Left) | Toggle between a vertical stack and a horizontal scrolling layout. |
| Horizontal Alignment | Align messages to the Top, Center, or Bottom when in horizontal mode. |
| Use Blocklist As Allowlist | Reverse the blocklist so only specified users can see their messages in chat. |
| Block / Allow List | Comma-separated list of usernames to either exclude or exclusively include. |
| Hide Message After | Set the duration (in seconds) before a message automatically fades out. Set to 0 to keep messages forever. |
| Ignore Commands | Prevent messages starting with a specific symbol (e.g., "!") from appearing. |
| Command Symbol | Define the prefix used to identify commands that should be ignored. |
✨ Design - General
| Name | Description |
|---|---|
| Avatar Display | Choose to show User Avatars, thematic Symbols (SVG icons), or hide them entirely. |
| Show Badges | Display or hide platform badges (Mod, VIP, Sponsor, etc.) next to names. |
| Inner Glow — Color | Set the color for the frosted glass "inner glow" effect on cards. |
| Inner Glow — Size (px) | Adjust the thickness/spread of the frosted glass highlight. |
| Google Font | Select any font from the Google Fonts library for the entire chat. |
| Left / Right Padding | Adjust the global side margins for the chat container. |
| Space Between Messages | Set the vertical/horizontal gap between individual message cards. |
🎨 Colors - By Role
These settings allow you to define unique glass tints and neon glows based on the user's role.
| Name | Description | Platform |
|---|---|---|
| Default — Card Background | The base glass tint for standard viewers. | Both |
| Default — Glow Color | The neon accent and symbol color for standard viewers. | Both |
| Subscriber — Card Background | The glass tint specifically for your Twitch subscribers. | Twitch |
| Subscriber — Glow Color | The neon accent color for your Twitch subscribers. | Twitch |
| Sponsor — Card Background | The glass tint specifically for your YouTube members. | YouTube |
| Sponsor — Glow Color | The neon accent color for your YouTube members. | YouTube |
| VIP — Card Background | The glass tint for your Twitch VIPs. | Twitch |
| VIP — Glow Color | The neon accent color for your Twitch VIPs. | Twitch |
| Moderator — Card Background | The glass tint for your channel moderators. | Both |
| Moderator — Glow Color | The neon accent color for your channel moderators. | Both |
| Broadcaster — Card Background | The glass tint for the streamer's own messages. | Both |
| Broadcaster — Glow Color | The neon accent color for the streamer's own messages. | Both |
🎭 Icons - By Role
Assign a specific thematic symbol to each role for avatar fallbacks and "Symbols" mode.
| Name | Description |
|---|---|
| Default — Icon | The SVG symbol assigned to standard viewers (e.g., Heart, Star). |
| Subscriber / Sponsor — Icon | The SVG symbol for your subs/members (e.g., Moon). |
| VIP — Icon | The SVG symbol for Twitch VIPs (e.g., Diamond). |
| Moderator — Icon | The SVG symbol for your moderators (e.g., Star). |
| Broadcaster — Icon | The SVG symbol for the streamer (e.g., Melody). |
📛 Design - Name Pill
| Name | Description |
|---|---|
| Font Size | Adjust the size of the username text. The pill height is adaptive. |
| Font Weight | Set the thickness (Normal to Extra Bold) of the username font. |
| Font Color | Set the color of the username text. |
| Corner Radius | Adjust how rounded the edges of the username pill are. |
💬 Design - Message
| Name | Description |
|---|---|
| Font Size | The size of the message text. |
| Font Weight | Contrast and thickness of the main message body. |
| Font Color | Set the color of the message text. The text glow automatically matches this color. |
| Card Corner Radius | Adjust how rounded the glass message bubbles are. |
| Horizontal Padding | Space between the side edges of the card and the text inside. |
| Vertical Padding | Space between the top/bottom edges of the card and the text inside. |
🔔 Event Settings (Per Type)
Customizable for: Follow, Tip, Subscriber, Super Chat (YouTube), Sponsor (YouTube), Raid (Twitch), Cheer (Twitch), Gift.
| Name | Description |
|---|---|
| Enable Alert | Toggle the visibility of this specific event type. |
| Background Color | Set a unique glass background tint for this specific event. |
| Glow Color | Set the neon accent and highlight color for this specific event. |
| Template | Customize the message text (e.g., "{{name}} just joined the family!"). |
🧪 Testing
| Name | Description |
|---|---|
| Enable Testing | Toggle a simulated feed of messages to preview your design in the editor. |
| Test Message Frequency (ms) | Adjust how quickly test messages appear in the feed (500ms to 10 seconds). |
- Open “Position, size and style” menu

- Change height, width, and opacity to your liking
⚠️ IMPORTANT
For all of your customizations to take effect, you need to press "Save" in the top right corner of the editor and refresh the page before adding the widget to your streaming software!
How to Add it to the Streaming Software?
OBS Studio
- Copy the URL of your Widget from the StreamElements dashboard
- Open OBS Studio
- Click “Add Source” (plus icon) in the Sources section.
- Add a “Browser” source, give it a name, and press “Ok”
- Paste the URL you’ve copied
- Set the width to 1920 and the height to 1080
- Press “Ok” and we’re done!
Streamlabs Desktop
- Copy the URL of your Widget from the StreamElements dashboard
- Open Streamlabs Desktop
- Click “Add a new Source” (plus icon) in the Sources section.
- Choose “Browser Source”, give it a name, and press “Add Source”.
- Paste the URL you’ve copied previously
- Set the width to 1920 and the height to 1080
- Now press “Close” and that’s it! Your widget is ready to use!