
Horoscope Widget

Thanks for downloading our widget!
Here you will find instructions on how to set everything up and an in-depth description of its possibilities.
⚠️ Take note: This widget is hosted on StreamElements and works only with StreamElements donations — make sure you have a StreamElements account before setting it up!
Widget Installation
- Log in to StreamElements with your Youtube or Twitch account
- Go to the “2. Widget” folder in the package you’ve downloaded
-
Pick the file that corresponds to your streaming platform (Twitch or YouTube) and double-click to install it.
Voila! Your widget is installed!
Widget Customization
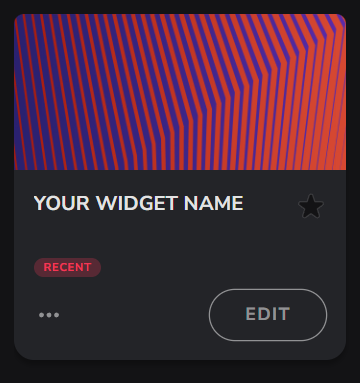
-
Pick your widget in your StreamElements dashboard and click “Edit”
-
Click on “Layers” and go to your widget.

- Go to the “Settings” tab


- Woohoo, here you can customize everything to your taste :)
⚠️ IMPORTANT
For all of your customizations to take effect, you need to press "Save" in the top right corner of the editor and refresh the page before adding the widget to your streaming software!

Customization Fields
🎫 Interaction Modes
The widget now features two distinct modes of operation to give you full control over how users interact with it.
| Mode | Description |
|---|---|
| Free | Everyone can use zodiac commands (e.g., !aries ) at any time without needing credits. |
| Paid | Credits are required to get a horoscope. Credits are granted automatically through paid triggers (Tips, Bits, Super Chats, etc.). |
💎 The Credit System (Paid Mode Only)
When the widget is in Paid Mode, users must "earn" a horoscope credit before they can use a command.
How it works:
- Granting Credits: When a viewer performs a "Paid Trigger" (e.g., a $5 tip or 500 bits), the widget grants them 1 Horoscope Credit.
- Chat Announcement: (Optional) The bot will post a message in chat notifying the user that they've received a credit.
- Claiming: The user can then type a zodiac command (like
!leo) to "spend" their credit and see their horoscope. - Moderator Control: Moderators and the Broadcaster can use the
!horo skipcommand to clear the current horoscope without spending credits.
General Settings
These settings are available for both Twitch and YouTube versions of the widget.
⏱️ Timing
| Name | Description |
|---|---|
| Display Duration (seconds) | Set how long each horoscope reading remains visible on screen. |
| Cooldown Between Summons (seconds) | Define the minimum wait time before the next horoscope can be triggered. |
📋 Queue
| Name | Description |
|---|---|
| Prevent Same User Repeating Same Sign (Same Day) | Stop a user from getting a reading for the same zodiac sign more than once per day. |
| Prevent Duplicate Users in Queue | Ensure a user can only be in the queue once at a time, preventing spam. |
| Max Queue Length | Set a limit on how many horoscope requests can be waiting in the queue. Use 0 for no limit. |
💬 Credit Announcements (Paid Mode)
| Name | Description |
|---|---|
| Announce Credit Grants in Chat | Enable/Disable bot messages when a user receives a credit. |
| StreamElements JWT Token | Required for the bot to send chat messages. |
| Delay Before Chat Message (s) | Wait time before the bot announces the credit in chat. |
| Chat Announcement Template | Customize the message (e.g., @{username} you got a credit! ). |
👁 Visibility
| Name | Description |
|---|---|
| Show Zodiac Sign | Choose whether to display the zodiac sign symbol. |
| Show Constellation | Choose whether to display the animated star constellation. |
| Show Title | Toggle the visibility of the horoscope's title (e.g., "Aries"). |
| Show Panel Ornament | Toggle the visibility of the decorative panel ornaments. |
| Show Username | Choose whether to display the name of the user who triggered the horoscope. |
🎨 Style
| Name | Description |
|---|---|
| Font Family | Select a custom Google Font for all text in the widget. |
| Accent Color | Choose the primary accent color used for highlights and ornaments. |
| Shadow Color | Set the color of the drop shadow effect on the main panel. |
| Shadow Intensity | Adjust the opacity and blur of the drop shadow. |
| Badge Gradient 1 & 2 | Set the two colors for the badge's background gradient. |
| Panel Background & Gradient 2 | Set the two colors for the main panel's background gradient. |
| Body Text Color | Choose the color for the main horoscope prediction text. |
| Username Color | Set the color for the user's name. |
| Title Font Size | Adjust the font size for the zodiac sign's title. |
| Body Font Size | Adjust the font size for the horoscope prediction text. |
| Username Font Size | Adjust the font size for the user's name. |
| Border Width | Set the thickness of the border around the main panel. |
| Panel Width | Adjust the overall width of the widget panel in pixels. |
| Panel Corner Roundness | Control how rounded the corners of the main panel are. |
| Panel Inner Padding | Set the amount of space between the content and the panel's edge. |
| Ornament Size | Adjust the scale of the decorative ornaments. |
⭐ Stars
| Name | Description |
|---|---|
| Zodiac Primary Color | Set the main color for the constellation lines and larger stars. |
| Zodiac Accent Color | Choose the color for the smaller, accent stars. |
| Zodiac Sparkle Color | Set the color for the bright, sparkling star effects. |
| Zodiac Sign Color | Choose the color for the zodiac sign symbol. |
🔊 Sound
| Name | Description |
|---|---|
| Enable Sound Effect | Turn the reveal sound effect on or off. |
| Sound Effect | Upload a custom sound to play when the horoscope is revealed. |
| Sound Volume | Adjust the volume of the sound effect. |
🧪 Testing
| Name | Description |
|---|---|
| Testing Mode | Enable a continuous loop of horoscopes for easy style setup and testing. |
| Delay Between Cycles (s) | Set the wait time between each horoscope reveal in testing mode. |
Twitch-Specific Settings
✨ Paid Triggers (Twitch)
Note: These grant credits ONLY in Paid mode.
| Name | Description |
|---|---|
| Enable Bits Trigger | Allow viewers to earn a credit by cheering with Bits. |
| Minimum Bits | Set the minimum number of Bits required for a credit. |
| Enable Tips/Donations Trigger | Allow viewers to earn a credit with a tip or donation. |
| Minimum Tip Amount | Set the minimum tip amount required for a credit. |
| Enable Sub/Resub Trigger | Grant a credit for new subscribers and resubscribers. |
| Enable Gift Sub Trigger | Grant a credit when a viewer gifts a subscription. |
💬 Chat Commands (Twitch)
| Name | Description |
|---|---|
| Zodiac Command Prefix | Set the prefix for zodiac commands (e.g., ! for !aries ). |
| Skip Command | Command for Mods/Broadcaster to skip the current reading. |
| Command Permissions | Restrict who can use zodiac commands (Broadcaster, Mods, VIPs, Subs, Everyone). |
YouTube-Specific Settings
✨ Paid Triggers (YouTube)
Note: These grant credits ONLY in Paid mode.
| Name | Description |
|---|---|
| Show on Super Chat/Sticker | Allow viewers to earn a credit with a Super Chat or Super Sticker. |
| Min. Super Chat Amount | Set the minimum Super Chat value required for a credit. |
| Enable Tips/Donations Trigger | Allow viewers to earn a credit with a tip or donation. |
| Min. Tip Amount | Set the minimum tip amount required for a credit. |
| Show on Member (Paid) | Grant a credit for new paid channel members. |
| Show on Gifted Membership | Grant a credit when a viewer gifts a membership. |
💬 Chat Commands (YouTube)
| Name | Description |
|---|---|
| Zodiac Command Prefix | Set the prefix for zodiac commands (e.g., ! for !aries ). |
| Skip Command | Command for Mods/Broadcaster to skip the current reading. |
| Command Permissions | Restrict who can use zodiac commands (Broadcaster, Mods, Members, Everyone). |
⚠️ IMPORTANT
For all of your customizations to take effect, you need to press "Save" in the top right corner of the editor and refresh the page before adding the widget to your streaming software!
How to Add it to the Streaming Software?
OBS Studio
- Copy the URL of your Widget from the StreamElements dashboard
- Open OBS Studio
- Click “Add Source” (plus icon) in the Sources section.
- Add a “Browser” source, give it a name, and press “Ok”
- Paste the URL you’ve copied
- Set the width to 1920 and the height to 1080
- Press “Ok” and we’re done!
Streamlabs Desktop
- Copy the URL of your Widget from the StreamElements dashboard
- Open Streamlabs Desktop
- Click “Add a new Source” (plus icon) in the Sources section.
- Choose “Browser Source”, give it a name, and press “Add Source”.
- Paste the URL you’ve copied previously
- Set the width to 1920 and the height to 1080
- Now press “Close” and that’s it! Your widget is ready to use!